Wednesday, February 17, 2016

Class Announcement: Basic Brioche

Photo Credit to DoeDeer Photography

Hello! This week I wanted to let you all know that I'm going to be attending the Green Camel Gathering in Tyler, MN on March 4-6, 2016. I'll be offering my Basic Brioche Class and will be selling print copies of my patterns while I'm there. This is the same class that I taught last year at North Country Fiber Fair and it's a lot of fun!!

Photo Credit to DoeDeer Photography

 During this 4-hour-class, students will learn the German Twisted Cast-on (also known as the Old Norwegian Cast-on), the Basic Brioche Rib Stitch, how to knit Brioche using 1 or 2 colors, and how to Bind-off your beautiful Brioche. Students will be provided with a free pattern (both in print and downloadable) for a Giant Color Shift Brioche Scarf, but in class we will be making a smaller sample piece so that all the techniques will be covered in the time allotted. By the end of class students will have the necessary skills to complete their scarf on their own.

 Materials students will need to bring to class:

For the In-Class Sample Piece:
- 50 yards each of at least 2 colors of worsted weight yarn (this can be scrap yarn).
- Circular knitting Needles 1-2 sizes smaller than what you would normally use for knitting Stockinette on Worsted Weight Yarn. (If you are a tight knitter, go down 1 size. If you knit more loosely, go down 2 sizes.)

For the Giant Color Shift Brioche Scarf:
- Size 7 (4.5 mm) 16" Circular Knitting Needles 
- 3 Balls of Knitpicks City Tweed HW in 3 different colors
OR
- About 165 yards each of 3 colors of any Aran/Heavy Worsted Weight Yarn
 

Photo Credit to DoeDeer Photography

 A giant scarf  might seem like a big undertaking for a beginner, but once you start it knits up super quickly thanks to the chunky yarn, color changes and the addiction of the Brioche Rib Stitch. If you've been seeing all the wonderful new books and patterns on Brioche that have been coming out lately, but you just can't seem to get it, try my class. Brioche really is a stitch that is easier to learn when there is someone there to show you and help guide you because it can be tricky to understand what the instructions mean without the visual. (And sometimes it's tricky even with good photos and videos.)

I have a lot of patience and had great results with my class last time I taught it. One of the attendees had only made a scarf, a hat and a washcloth before I showed her how to knit Brioche and by the end of class she was zipping along on her piece. This is such a fun knitting technique and the squishy, wonderful fabric that it creates will have you falling in love with it, too!

I've created an event on the Green Camel Gathering Facebook page for sign-ups that includes pricing and I have posted the pattern for my Giant Color Shift Brioche Scarf to Ravelry. If you just want the pattern, you can buy it through my Ravelry store, but if you take the class, remember that you will get a copy of the pattern (and a code for the download) free in class.


Have a great week of crafting everyone!
Shaina  ^_^

Photo Credit to DoeDeer Photography

Wednesday, February 10, 2016

Yarn Review: Dream Club February 2016


Hello everyone! This month for my yarn review, I'm again reviewing this month's Dream Club yarn and pattern. For February we have Dream in Color Classy with Cashmere in a highly variegated, beautifully bright colorway. Classy with Cashmere is a super squishy yarn that is made up of 70% Superwash Merino, 20% Cashmere and 10% Nylon. The ball band on the skein that I received said that it was Superwash Merino (Ravelry says Merino), but the washing instructions say to hand wash (probably because of the cashmere) so keep that in mind when choosing your projects.


I am absolutely in love with the colorway for this month!! With the bright, vibrant pops of reds, blues, yellows and oranges set against the more prominent greens and purples this skein of yarn instantly made me think of rainforests (well, Rainforest Cafes at least). The yarn itself is soft and bouncy and I couldn't wait to take it's picture, wind it up and start knitting. 


I've been a member of the Dream Club off and on for a few years now, but I don't think that I've ever actually knit with Classy with Cashmere before. (Most of my previous Dream Club skeins went straight to feeding the stash because I used to have a difficult time knitting my favorite yarns.) I've been working on lots of large fingering weight projects lately, so this gorgeous worsted weight was absolutely perfect and it feels so luxurious as you knit with it. As I mentioned in my last yarn review, I love Jilly with Cashmere and Smooshy with Cashmere (notice the theme) and now I can add Classy with Cashmere to the line-up. A sweater knit with this yarn base would be a dream both to make and to wear and is now on my goals list for this year.


Photo Credit to Lara Neel

The pattern that came with the February Yarn was Pleasant Pheasant by Lara Neel. Not only is Lara the amazing author of Sock Architecture, she also used to be in my knitting groups back in the day before she moved out of town. Pleasant Pheasant is a slipper pattern  that she has created using the Eye of Partridge stitch as the all over pattern to enhance the longevity of these beautiful slipper socks. She doesn't mention it in her pattern notes, but I also think that the use of a slip-stitch pattern was a wonderful idea to break up the intense colors and help to combat awkward pooling.

 The only issue that I have with this yarn/pattern combo is the fact that these are slippers and this is a handwash only yarn. I am definately casting these on as soon as my Doodler is finished, but I would have been a bit happier if the yarn was a superwash. I suppose that I can't have it all, though. If the yarn was a superwash, I doubt that it would have had cashmere and then I never would have gotten this colorway on this base. So, all in all, I am very pleased with this month's pairing and I can't wait to cast-on my Classy with Cashmere Pleasant Pheasant slipper socks.

Have a great week of knitting, see you next Wednesday!
Shaina  ^_^

PS: Sign up for my e-mail list to receive 50% off my Hearts Alive cowl through the end of February!!

Friday, February 5, 2016

Fresh New Pattern: Hearts Alive Cowl!

Hearts Alive is a super quick and cozy cowl pattern that features a simple Heart Cable pattern. It’s knit using 4 strands of a light fingering weight yarn which makes it extra dense and perfect to combat those February winds. The project begins with an I-Cord Cast-on, the cable pattern is then worked in-the-round for a few repeats and then an I-Cord Bind-Off is used to give it a clean edge. Instructions are included for both the I-Cord Cast-On and Bind-Off, so don’t worry if you haven’t tried these techniques yet.
  
You will need:
  • 500-880 yards of a light fingering weight yarn
  • size 10 (6mm) Circular Knitting Needles in 16”(20”; 24”, 29”) length
  • Cable Needle
  • Yarn Needle

There are 4 size options and all sizes do require 2 skeins of yarn.
Originally when I started designing this cowl, I was planning on using a bulky/heavy worsted weight yarn, but I was continually drawn to the beautiful Linaza from Plymouth Yarn Company. It's listed as a sport weight yarn, but it feels more like a light fingering weight so I decided to hold the yarn quadruple and knit it up on larger needles. This means that the small size is a perfect weekend project and the larger sizes can be easily completed in 1-2 weeks. The blend of Alpaca/Linen/Tencel knits up into a beautiful, squishy fabric that is perfect to combat the intense February winds.


The guage swatch that I made was 20 sts x 30 rows for a 5” square.
(That way you can do an entire repeat of the Heart Cable Pattern.)
My birthday is on February 13, so this is my favorite month and I have always felt like Valentine's Day is my holiday. Because of that I knew that I had to include a heart motif on this cowl and I've really been feeling the cables lately so this was the perfect melding of the two. The cables get an extra pop because they are made by doing a K1, P1, K1 on each set of cable stitches. Surprisingly, this doesn't create a ribbing effect, it just serves to plump up the cables more than they would be naturally. I also really enjoy the slight complexity that the seed stitch at the center of the hearts provides because it makes you pay more attention to what you are doing. You don't get bored, but it also isn't so complex that you get frustrated. 


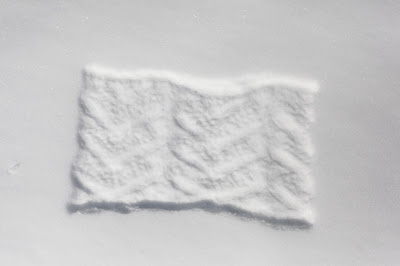
Cowl snow prints post photoshoot.
I'm a sucker for a clean, finished edge so the I-cord cast-on and bind-off were my best options (plus, they match beautifully with the cables). My first attempt was with a provisional cast-on, but the cables made for a terrible pick-up attempt when it came time to finish the cowl. So, at the suggestion of my test knitter, Katie, I learned how to do the I-cord cast-on and incorporated that into the design. If you need a video tutorial for the cast-on, www.NewStitchADay.com has a great one.


Become a love bandit with your own Hearts Alive cowl!
I'm offering a 50% discount on this pattern to my e-mail subscribers through the end of February, so be sure to sign up at the top of the page to get your coupon code. Also, tag your knits with #YumiYarns and #HeartsAlive when you post on social media for a chance to be featured in an upcoming e-mail blast and to be entered for a chance to win an adorable knitting pouch duo.


Win this adorable knitting pouch duo by using the tags #YumiYarns and #HeartsAlive