Wednesday, August 3, 2016

Tour De Fleece 2016 Wrap-Up


All the goodies from our Art Yarns Challenge Day event last month. Thanks so much to Katie Best for doing the Demo and for donating so many wonderful prizes for this year's participants!!
Tour De Fleece has ended for another year, but our local team, Athena's Twisted Sisters did a pretty good job making a dent in each of our respective fiber stashes. Our team's focus was on having fun and getting each other excited about spinning and maybe trying out some new techniques along the way. Our individual goals were to try to spin as many meters of yarn as the riders in the Tour De France travel in kilometers (3519). Not all of us made it that far, but we all did at least a little spinning and we all had a great time enjoying each others company at least once each week for the past month.

The rest of this post is a collection of our team member's totals and photos of the completed handspun. If there was more than one picture to choose from, I tried to pick the one that I thought the spinner would like showcased. I'm really so proud of our team and I couldn't be happier with how everyone did! Even though we didn't have a stretch goal, I thought that it would be fun to see how much we spun together as a team...

Collectively we spun at least 20,332 meters!!

Thanks so much to everyone who participated and for those who were on the sidelines cheering us on! I hope that you will all join us for Spinzilla 2016 in a few months and bring a friend.

Enjoy the yarn porn below and if you aren't a spinner but are interested send me an e-mail, I'd love to enable you into this fun craft!
Shaina  ^_^

My own handspun from the tour.
Shaina:


_________________________________________________________________________________

Sdpenrn spinning through a length of Malibrigo Nube.
Jarrod:


_________________________________________________________________________________
Some of Luvewebygk's beautiful singles. A special thank you as well to Gerry Kay who donated some wonderful spinning fibers and kits as prizes for this year's team as well!!
Gerry Kay:


_________________________________________________________________________________

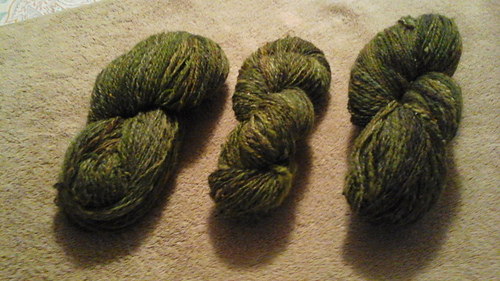
Except for the neon green in the center, all of Evesch's handspun in this picture if from the same roving. I love how she split the fiber to preserve the color-changes and then plied it with a commercial yarn that had sparkly sequins for even more of a pop!
Eve:


_________________________________________________________________________________

Photo credit to OmniGeek
Katie:


_________________________________________________________________________________

Photo credit to Defiant1
Lorna:


_________________________________________________________________________________

Photo credit to Cloudlakes
Amy:


_________________________________________________________________________________

Photo credit to Cooneen
Colleen:


_________________________________________________________________________________

Photo credit to Martyshandspun
Marty:


_________________________________________________________________________________

Photo credit to Danugraywolf
Lauri:


_________________________________________________________________________________

I did fail to get pictures of everyone's spinning (sorry!!) so here are the couple that I missed:
Nancy:


Wendy:


Lisa:


Wednesday, July 27, 2016

Knitting Tutorial: German Short-Rows (Purl-wise)

Hi, guys! I'm back this week with the second installment of the German Short Rows Tutorials. This time I'll be showing you how to knit these purlwise and get your fabric to lean to the right (when the right side is facing). If you missed part 1 of these tutorials, you can check it out here: Tutorial: German Short Rows (Knit-Wise)

I also wanted to point out that this short-row technique works perfectly as a replacement for the Wrap & Turns used in my Soiree Slouch and The Highlighter Affair Hat Patterns. I'd love for you to give this technique a try so I'm offering a special Buy 1, Get 1 Free offer on these 2 patterns through 11:59 PM (CST) on 8/2/16. Just add both hats to your cart and when you check out the Soiree Slouch will show as a free item, no coupon code required!

Now, time for the how-to...


Step 1: Purl to the last stitch of your short-row. (The stitch that would have been wrapped.)


Step 2: Turn work, bring yarn to the front.


Step 3: Slip 1 stitch from the left needle to the right needle purl-wise.


Step 4: On your right needle, wrap the yarn over top of the stitch that was just slipped.


Step 5: Pull the yarn to the back tightly so that the slipped stitch synches up and the stitch below wraps around the right needle. (It will now look like 2 stitches.)

Keep yarn to the back & knit as normal.
OR
Bring yarn to the front of your work and begin purling as normal.
(Use whichever stitch your pattern calls for.)


Here is what the back-side of your work will look like with the short-rows happening every-other stitch starting with the first stitch on the left needle. Notice how you can see the stitch from below wrapping over the needle and looking like it is 2 stitches that sit too closely and awkwardly together.


Here is a view from the front of the same stitches that have been used for short-rows. On this side it almost looks like a brioche stitch with the right leg almost passing over the top of the left.


To finish your German Short-Rows and work across them, simply purl the 2 legs of the turning stitch together when you come to them. Work all the other stitches as your pattern indicates.

I hope that you found this tutorial helpful and please share it with anybody that you think will benefit from this technique. Give it a try yourself and let me know how you like it. Be sure to pick up your copies of the Soiree Slouch and The Highlighter Affair while they're on sale, too. I'd love to see your projects and hear your thoughts leave a comment or join my Ravelry Group to join in on the discussions happening over there and to post pictures of your finished projects or works-in-progress.

Have a great week of crafting, I'll see you soon!

Shaina  ^_^

Wednesday, July 13, 2016

Tutorial: German Short Rows (Knit-wise)

Hello everyone! This week I wanted to give you a tutorial on making German Short-Rows. (Which just happen to work beautifully in my Soiree Slouch and The Highlighter Affair Hat Patterns in place of the Wrap & Turns.)

I recently learned this technique and I'm absolutely in love. Seriously, it's like magic. The first time that you do it and see how it works and makes a nice, smooth turn in your knit fabric will be like the first time you turned a heel in a sock. After I did it for the first timed I proceeded to show anyone around me who would listen how they worked. (Even my non-knitting hubby was forced to learn German Short-Rows.)

These can be used in place of a traditional wrap & turn or most other short-rowing techniques. The difference is that you get a much more fluid movement in the fabric than with other techniques that I've seen and you don't have to try to pick-up wraps as you're working over the turning stitches. I just can't get enough of them and I hope that you enjoy them as much as I do!

(I've added a tutorial for doing these purlwise: HERE. Enjoy!)


Step 1: Knit to the last stitch of your short-row. (The stitch that would be wrapped if using the wrap & turn method.)


Step 2: Turn work, keeping yarn in front.


Step 3: Slip stitch (purlwise) to Right Needle.


Step 4: Wrap yarn over the top of the stitch that was just slipped to the Right Needle.

Step 5: Pull yarn to the back tightly so that the slipped stitch synches up and the stitch below wraps around the right needle...


...it will now look like 2 stitches.


(This is what it will look like on the Right Side of the fabric.)


Step 6: Bring yarn to the front of your work and begin purling as normal.
OR
Keep yarn to the back & knit as normal.
(Use whichever stitch your pattern calls for.)


Here is a completed section of short-rows waiting to be picked up. (Short row turns occur every other stitch.)


You can see where the short-row turns are by looking for the stitches that look similar to purls. When you look closely you will see that  they are the stitches that were wrapped over the needle when you turned.


To finish your German Short-Rows and knit across them, simply knit the 2 legs of the turning stitch together when you come to them. Knit all the other stitches as your pattern indicates.


I hope that you enjoyed this little tutorial and that it will help you to have smoother knitting when you use short-rows. Have a great week of crafting, I'll be back next week with the Purl-wise version!

Shaina  ^_^

Wednesday, July 6, 2016

Registration For North Country Fiber Fair 2016 Is Open!!


Hi, guys! This week I'm pleased to announce that the booklets have been distributed and class registration has opened online for the North Country Fiber Fair 2016 and...

I'll be teaching 2 classes this year!!

Join me on Friday, September 16th at 5 PM to learn the most addictive blanket pattern you've ever seen!
Perfectly Portable Crochet
Come learn some tips and tricks to making your own super portable Busy Bee Crochet Throw! This pattern is made of granny square-esque hexagons that are all seamed together in a way that provides a textural and visual contrast. The hexagon pattern is very easy to memorize so all you need to have with you is your yarn and a crochet hook (like sock knitting for crochet!). In class you will learn how to make the hexagons, how to read a crochet chart, how to adjust the pattern so that you can use stash (or scrap) yarn, and how to connect the hexagons. Included are a copy of the pattern to use in class as well as a Ravelry code for the digital version. Join us in learning how to make this very addictive and perfectly portable crochet project!

 Click Here To Register For This Great 3 Hour Workshop


Winter is coming, prepare for sub-zero temps with squishy, warm Brioche Knitwear! Learn this fun technique with me on Sunday, September 18th at 12:30 PM.
 Basic Brioche Knitting
Have you been drooling over all the beautiful Brioche designs that have been showing up all over this past year but don't think that you could ever knit something that complicated? Think again! The goal in this workshop is to show you just how easy this fun technique really is and to get you comfortable in your knitting. In this 3-hour class students will learn the German Twisted Cast-on (also known as the Old Norwegian Cast-on), Basic Brioche Rib Stitch, how to knit Brioche using 1 or 2 colors, how to bind-off and (most importantly) how to read their knitting. Students will be provided with a free pattern for a Giant Color Shift Brioche Scarf, but in class we will be making a smaller sample piece so that all the techniques will be covered in the time allotted. By the end of class, students will have the necessary skills to complete their scarf on their own and venture into the wonderful, squishy world of Brioche Knitwear!

 Space Is Limited In This 3 Hour Workshop, Click Here To Reserve Your Spot


If you've never gone to NCFF, you are missing out. This is one of my all-time favorite fiber events because it's very relaxed and well-organized. 2016 will be the 3rd year that I've attended and the 2nd year that I will be teaching classes. There is a wonderful marketplace that isn't overwhelmingly large, but isn't tiny either. The vendors are all great people that you can chat with and get to know either while they are running their shops or in the spinning circle after the market closes. I set aside funds all year so that I can have a blast during this weekend and last year purchased my spinning wheel (Murderbot 10,000) after taking a beginning spinning class on the first night of NCFF 2015.

A photo posted by Shaina Scott (@yumiyarns) on

Murderbot, Katie, our friend Sara and myself will be attending NCFF all weekend (September 16 - 18, 2016) and are planning on taking a few classes. I'm really looking forward to some great spinning and knitting classes from the featured teachers for this year: Kate Larson (spinning) and Margaret Radcliffe (knitting) and I hope to see you all there!

Have a great week of fiber crafting!
Shaina  ^_^

Wednesday, June 15, 2016

Venture into Brioche with The Wild Wild West Mini Cowl!

Last fall I was asked to design a pattern for one of my favorite local indie dyers, The Dyeing Arts. They have absolutely beautiful yarns and their colorways for both yarn and fiber are astounding! Some of my favorites have names like Sugar Skull, Electric Slide, Divinity and Diamond. The Dyeing Arts is based out of Omaha, NE and I look forward to visiting their booth every September at the North Country Fiber Fair so if you see their booth at an event, be sure to stop by and pet all the pretties.

The Wild Wild West Mini Cowl is going to be the featured pattern in and upcoming month of The Dyeing Arts' Luxury Yarn and Swag Box. If you are interested in a kit, contact Tara through their website or sign up for the Subscription, I promise that you won't be disappointed because everything they have is amazing!

Save 20% this week only by using code: wwwmini at checkout

The Wild Wild West Mini Cowl

Squishy brioche stockinet fabric knit-up in The Dyeing Art’s beautiful Smashing base was the starting point for this textural cowl. The subtle pinstripes on the RS reminded me of some old-timey photos of female gunslingers from the 1800’s and I just knew that this cowl had to have bandana shaping and a lacey finish. The WS of brioche stockinet creates an amazingly textured fabric that helps the variegated yarn shine with pops of color sprinkled throughout the whole piece. So give the top of the cowl a little twist when you wear it and let your W(ild) S(ide) show.

This fun beginner brioche knit is knit in-the-round first and then switches to being knit flat. This way you get a lovely drapey cowl that makes the most of some beautiful 50g skeins of fingering weight yarn.

Recommended Yarn:
1 - 50g Skein each of Smashing by The Dyeing Arts in (MC) Plumage And (CC) Peacock - 60% Merino Wool, 20% Yak, 20% Silk - 190 yds (91 m) / 50 g

Needles & Notions:
- US Size 2 (2.75 mm) 16” (40 cm) Circulars
- Stitch Markers, Tapestry Needle

Size:
Circumference
23” (58 cm)
Length
11” (28 cm)

Gauge:
24 sts x 32 rows /
4” (10 cm)
in Brioche Stockinet

 Have a great week of crafting everyone! Remember that Saturday, June 18th is World Wide Knit In Public Day and we need to represent in whatever way is the most fun for you. I hope that you're joining us in the WWKIPD Knit-A-Long, but if not I hope that you go out and knit somewhere fun with people you love.

Shaina  ^_^

All Photography by DoeDeer Photography